What's a Blog?
The word “blog” is short for weblog. It is a frequently updated webpage that organizes entries or “posts” by date. While the content of blogs varies, it usually comes in the form of short posts that are two to five paragraphs long. Most blogs allow their readers to make comments about individual posts that are then included below the main blog post. This openness to input creates a dialogue between the author and the readers. Another key feature of blogs is their use of RSS feeds.
What’s an RSS Feed?
RSS stands for real simple syndication. An RSS feed is a file that is stored on a webserver that contains the content of the blog. This file allows users to automatically download the latest blog posts without having to visit the site using a RSS reader. A RSS reader serves as a collector for all of the content that you want to receive from various RSS feeds.
Subscribing
The process of adding a new RSS feed to your RSS reader is called subscribing. If you like a blog you are reading, simply subscribe to it to receive new content as it is posted. Don’t worry, there aren’t any fees or contract terms involved. The “Add to Google” and “+ MyYahoo” buttons on your blog allow you to quickly subscribe to it, if you use Google or MyYahoo as your RSS reader.
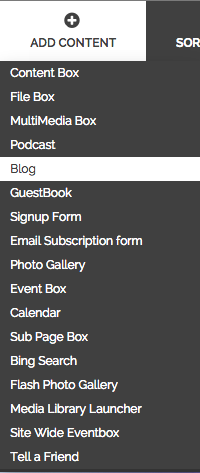
1. Add a blog to your site
1.1. From the "Add Content" menu on your administrative tool bar choose Blog
1.2. The Add Blog screen will pop-up. This screen allows you to setup up your Blog before you create your first post. Fill out each of the fields listed:
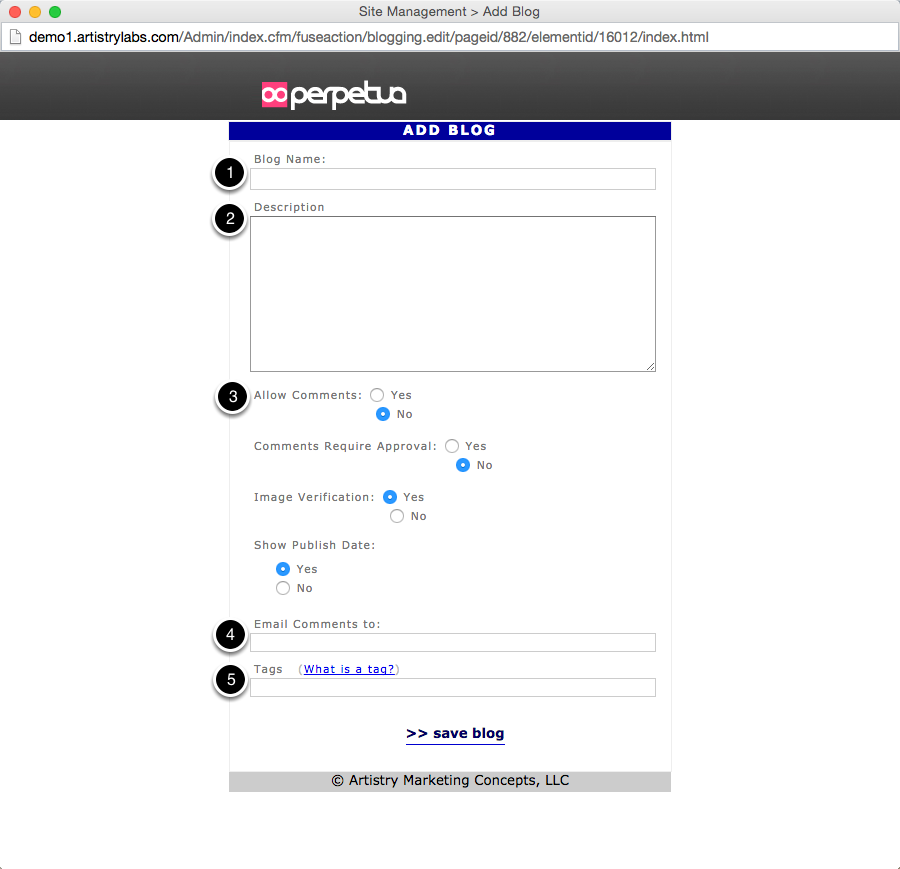
- Blog Name – This is the title of your blog. A common choice is the name of your organization followed by the word "Blog". For example: Artisrty Marketing Blog. Your blog name will be displayed at the top of your blog.
- Description – This is a general description of your blog. It applies to the entire blog. The description is only included in your blog’s RSS feed, it is not displayed on your blog’s webpage.
- Allow Comments – You have the option of allowing visitors to your site to leave comments about your individual blog posts. These comments will be visible to all visitors to your blog, however you can delete any comments that are inappropriate. Choosing "Yes" turns comments on, choosing "No" turns comments off.
- Email Comments to – This is an email address that will be notified anytime a new comment is posted on your site. While this is an optional field, we recommend using it if you are going to allow comments on your blog
- Tags - Tags are one-word descriptors used to label your blog. In the future we plan to offer the ability to search for blogs and posts by tags. Tags cannot contain quotation marks or spaces, but are otherwise unrestricted. Separate tags with a space.
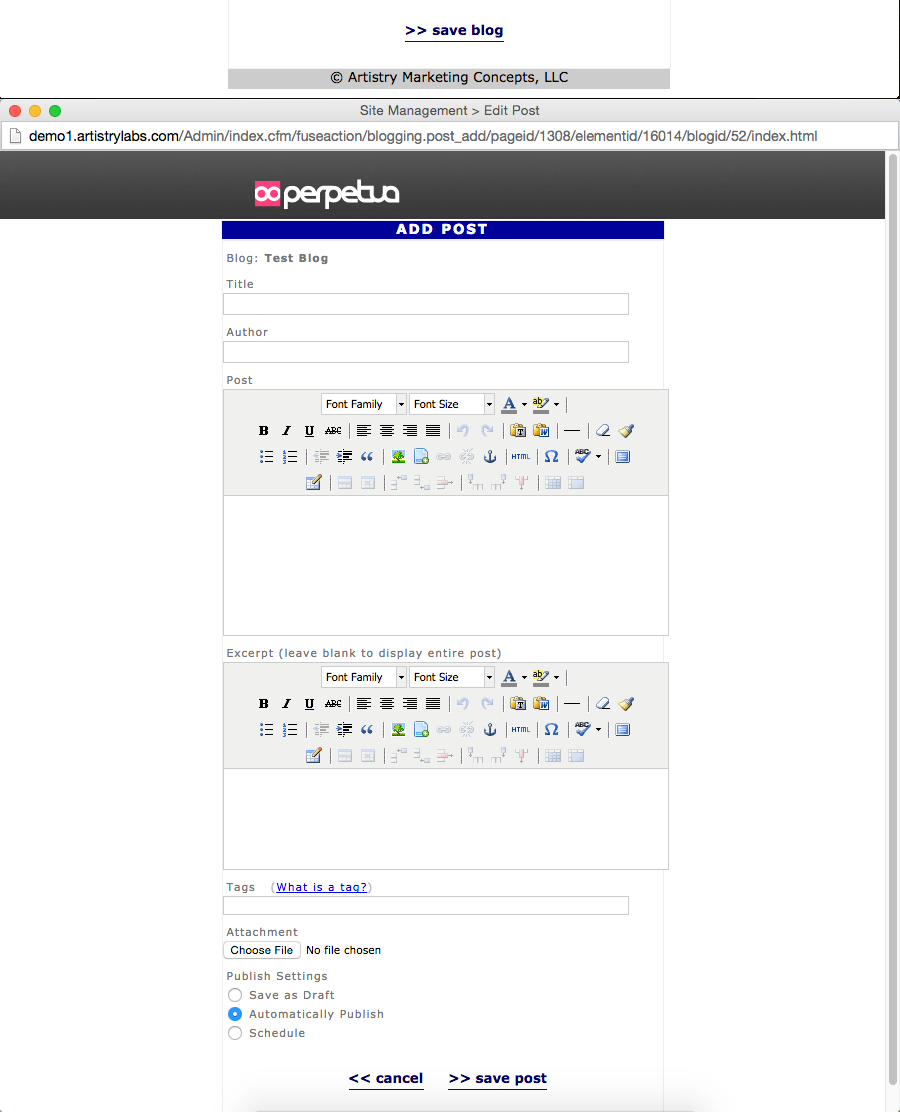
1.3. Click the Save button. After clicking the save button you will be taken to the Add Post window to post your first blog entry.
2. Add a post to your blog
2.1. To add a post to a blog that you have already created, click the Edit or the Plus Icon in the top right hand corner of your blog.
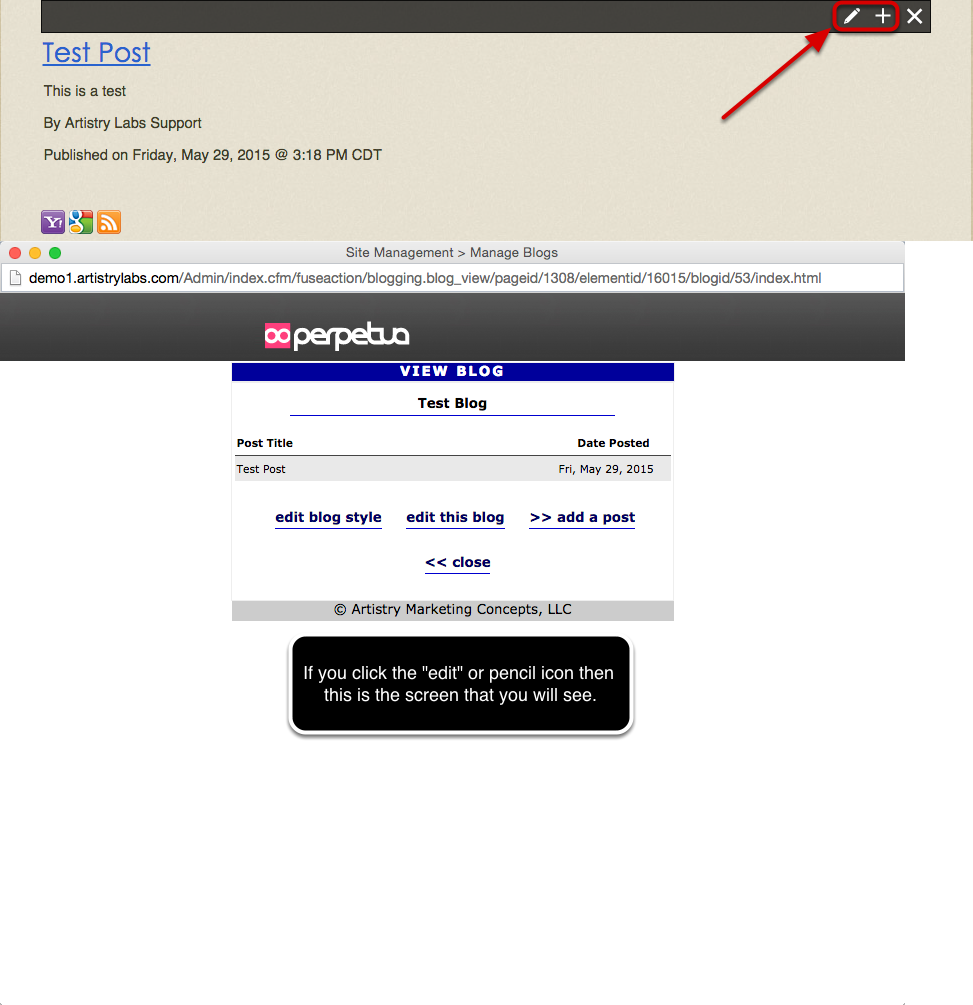
The pencil icon will take you to manage all of your posts where the plus icon will just take you straight to adding a new post.
2.2. Fill out the appropriate fields in the Add a Post screen
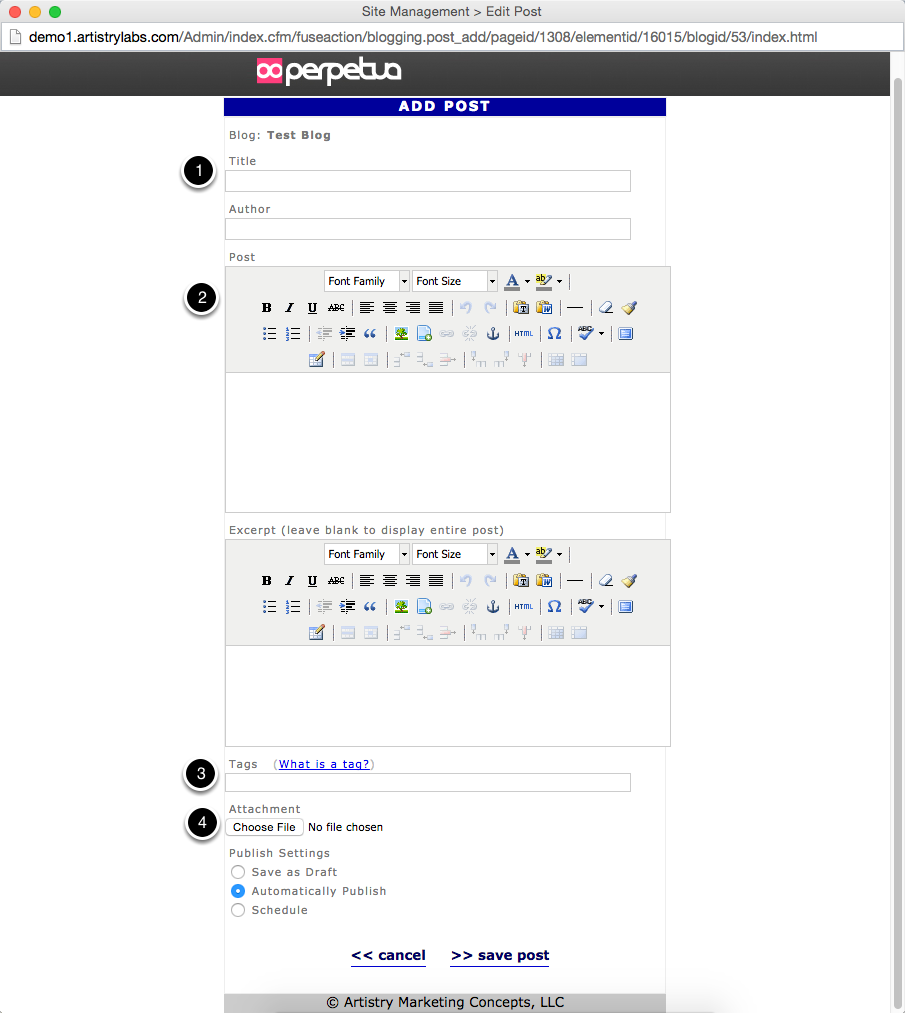
- Title - This is the title of your post. It will display in bold letters above the text of your post.
- Post - This is the main content area for your blog entry. You can type text using the same tools available in Content Boxes, or copy and paste it (Ctrl + V) from another program like Microsoft Word.
- Tags - Tags are one-word descriptors that you can use to label your post. In the future we plan to offer the ability to search posts by tags. Tags cannot contain quotation marks or spaces, but are otherwise unrestricted. Separate tags with a space.
- Attachment - You can add an attachment to your blog post that will allow users to download the file you attach. Visitors to your blog’s webpage will click on the attachment to download it. Users who have subscribed your site’s RSS feed will receive the download automatically.
2.3. Click on the Save Post button
3. Managing blog comments
You can allow visitors to post comments to your blog. You can also set your comments so that they require approval before being posted to the website. If you enable these options, the comments will be emailed to you. You can then follow these steps to approve your comments.
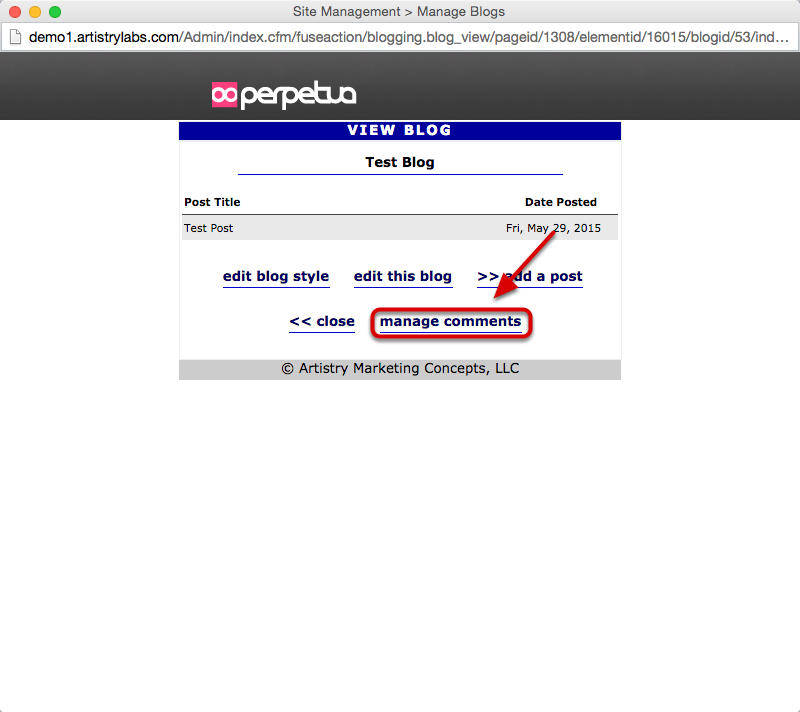
3.1. Login to your site.
3.2. Navigate to your blog page.
3.3. Click on the pencil button to manage your blog.

3.4. Click on Manage Comments.
3.5. Click on either Approve or Delete beside each comment.
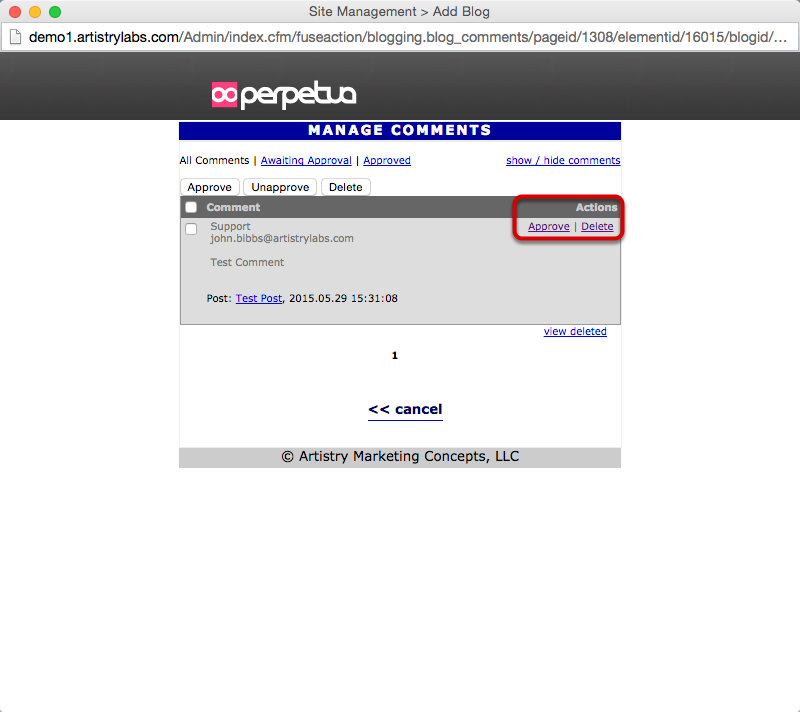
If you approve the comment, it will automatically be posted to the blog page. If you delete it, then it will not be posted to the page. Once a comment has been approved it can be unapproved if you want to temporarily remove it from the blog again.
Comments